Bringing Your Book of Business to Taino
One of the first steps when joining Taino Solutions is importing your existing customer base—your book of business. This guide walks you through preparing your customer data in a CSV spreadsheet and using our import wizard to bring all your customers into the platform quickly and accurately.
How to Access Customer Import
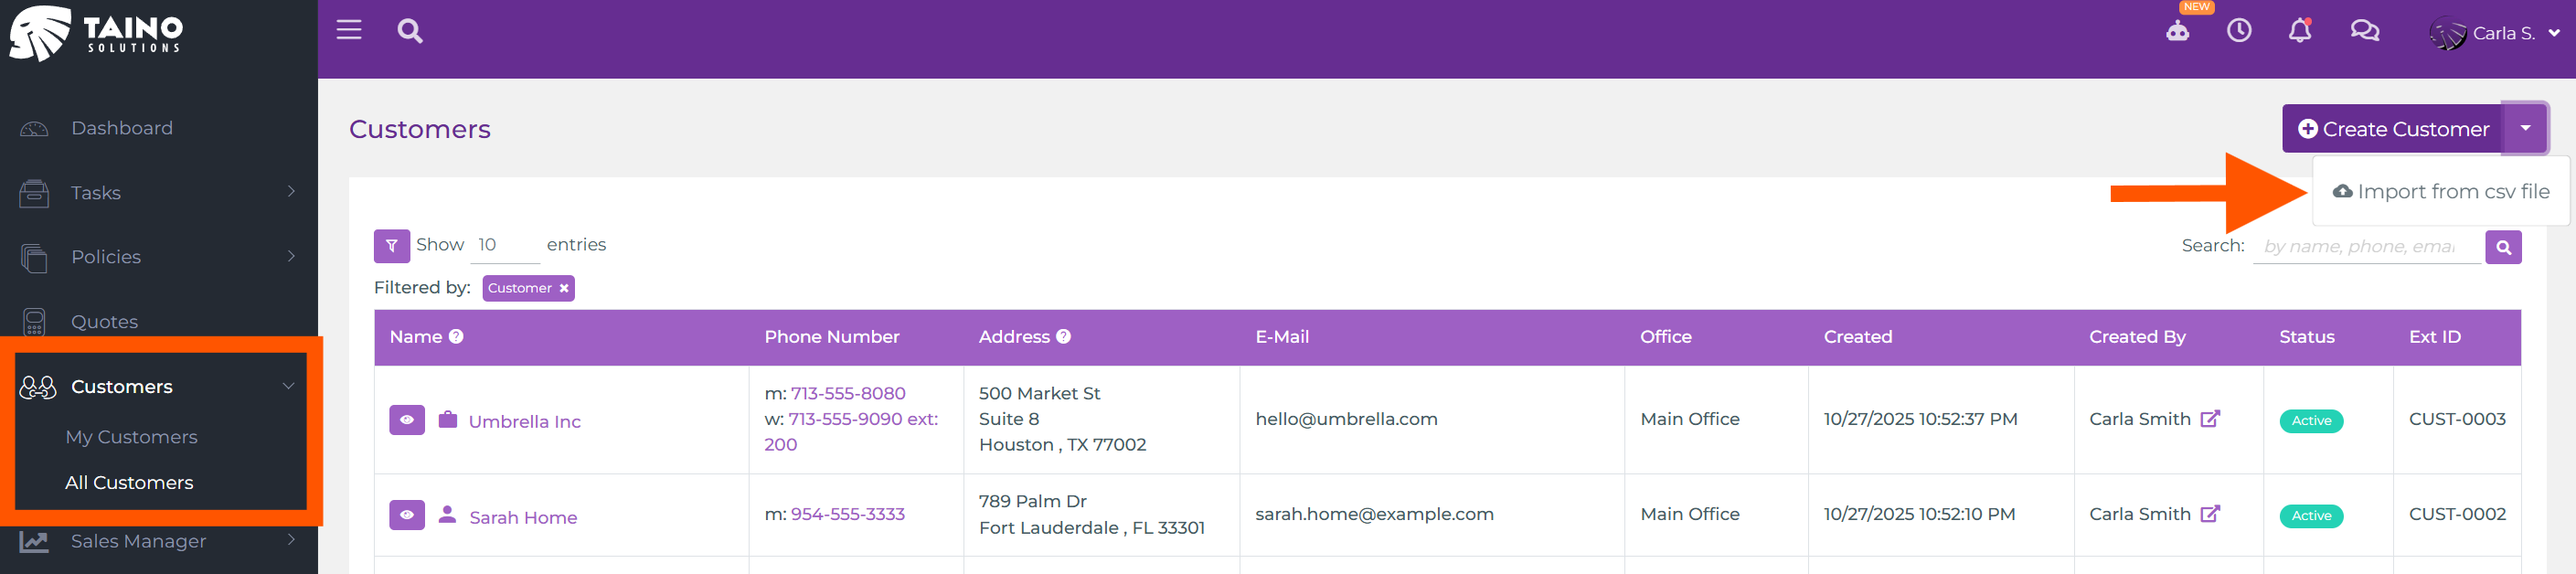
To import your book of business:
- Navigate to Customers in the left navigation menu
- Click the purple Create Customer button in the top-right corner
- From the dropdown menu, select Import from csv file
Preparing Your CSV File
Before importing, you need to prepare your customer data in CSV (Comma-Separated Values) format. The platform provides a template to help you get started.
Download the CSV Template
When you click the import option, the import wizard opens. On Step 1 (File Upload), you'll see a link to Download our CSV template. This template shows you exactly which columns are required and recommended for a successful import.
first_name, not "First Name" or "firstname". Mismatched column names will cause the import to fail or skip fields.
Required and Recommended Fields
The CSV template includes many columns, but not all are mandatory. Here's what you need to know:
Required Fields:
first_name- Customer's first namelast_name- Customer's last nameemailorphone_number- At least one contact method (email or phone) is required
Highly Recommended Fields:
target_agent_email- Email address of the agent who should be assigned to this customer. If not provided, customers will be assigned to you (the person doing the import) by defaulttarget_office_name- Name of the office this customer belongs to. If not provided, customers will be assigned to your office by default
Optional but Useful Fields:
address_line_1,address_line_2- Street addresscity,state_province_region,postal_code,country- Location informationbusiness_name- For commercial customerswebsite_url- Customer's websitework_phone_number,work_phone_number_extension- Additional contact methodsexternal_id- Your own customer ID/reference number from another systemis_commercial_customer- Set to "TRUE" for commercial customers, "FALSE" or leave blank for personal customers

Step-by-Step Import Process
Once your CSV file is prepared, the import wizard guides you through three simple steps.
Step 1: Upload Your CSV File
The import wizard opens with a drag-and-drop area where you can:
- Drag and drop your CSV file directly into the designated area
- Click to select a CSV file from your computer
The wizard also displays important information about required columns and provides helpful links to download the template or watch a tutorial video.
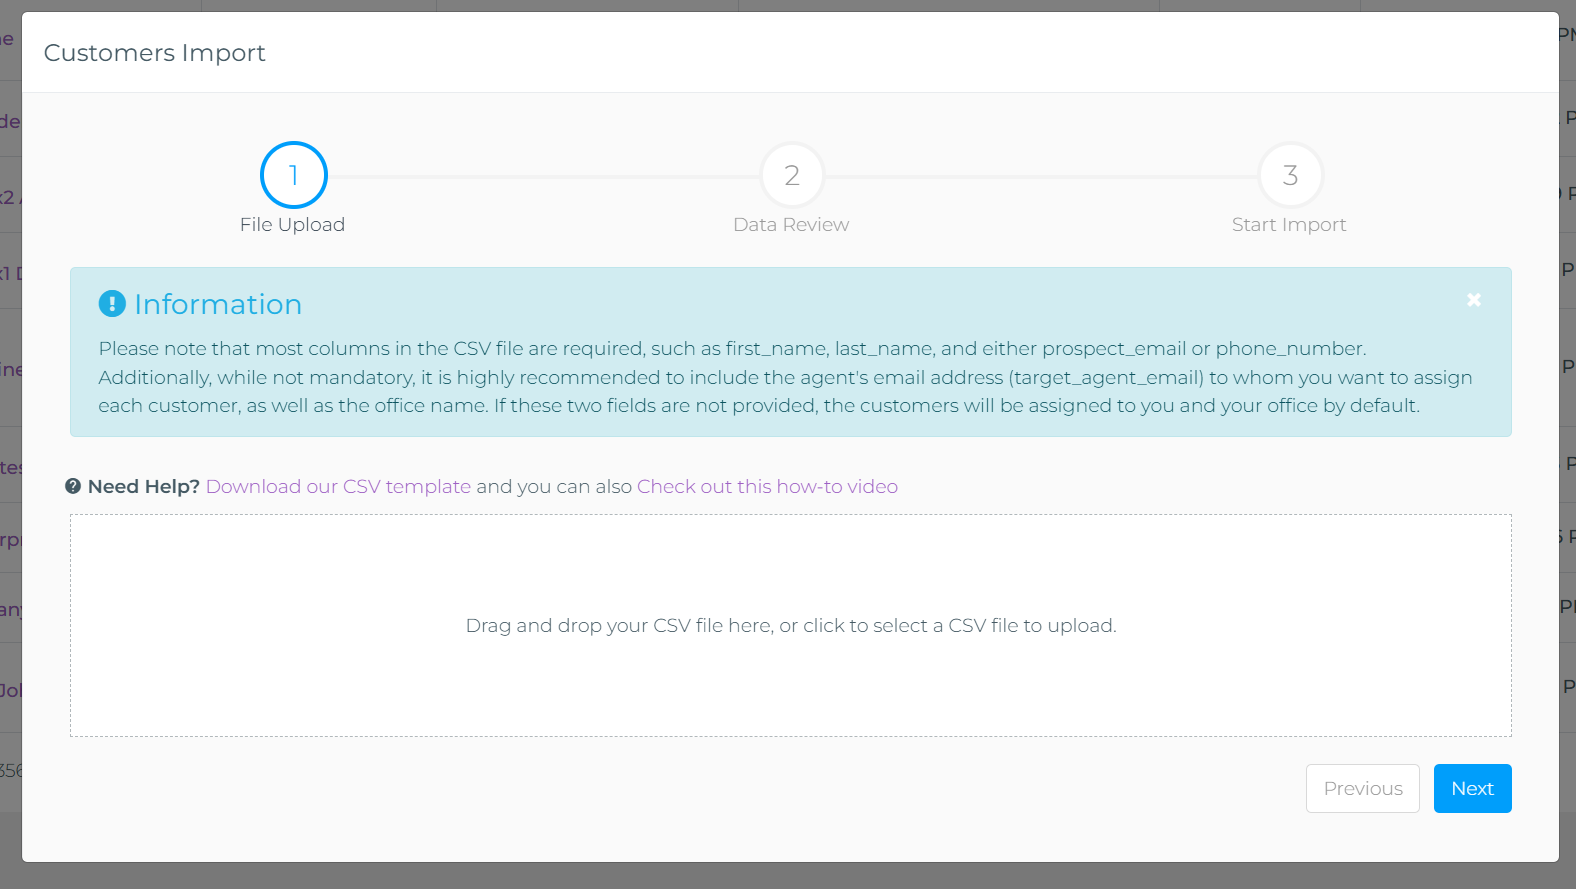
After selecting your file, click the blue Next button to proceed to data review.
Step 2: Review Your Data
In Step 2, the wizard shows you a preview of the data you're about to import. This is your chance to verify everything looks correct before completing the import.
What You'll See:
- Sample rows from your CSV file displayed in a table format
- Column mappings showing how your CSV columns will be mapped to customer fields (First Name, Last Name, Mobile Phone, E-Mail, Agent, Office)
- Status indicators for each record:
- Green checkmark (✓): Record is complete and ready to import
- Orange warning icon (▲): Record has minor issues but can still be imported (e.g., missing office assignment, missing agent assignment)
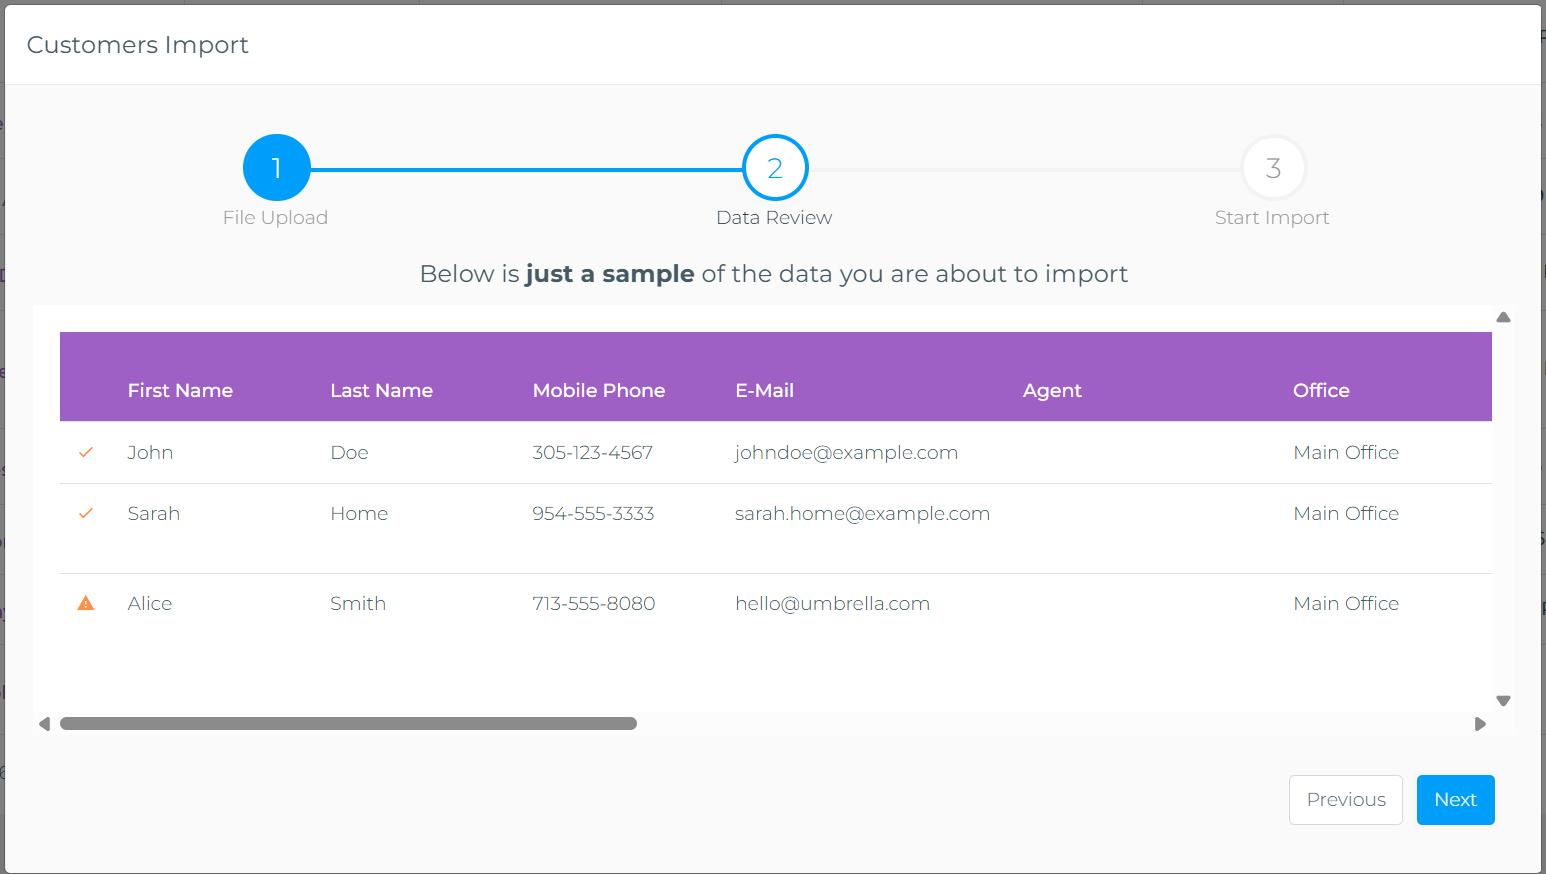
Review the preview carefully, then click Next to see the final summary.
Step 3: Import Summary and Confirmation
The final step shows you a complete summary of what will happen when you confirm the import:
- Total records processed from your CSV file
- Office assignments - How many records will go to each office
- Agent assignments - How many records will be assigned to each agent

When you're satisfied with the summary, click the blue Import Customers button to start the import process.
What Happens After You Click Import
Customer imports are processed as asynchronous background tasks, which means they happen behind the scenes without blocking your work. Here's what to expect:
- Immediate confirmation: You'll see a notification that your import has been queued for processing
- Background processing: The platform processes your customer data in the background. Small imports (under 100 customers) typically complete within seconds, while larger imports may take a few minutes
- In-app notification: When the import completes, you'll receive an instant notification within the platform
- Email report: You'll also receive a detailed email with:
- Total number of customers imported successfully
- Any errors or warnings encountered
- Summary of office and agent assignments
After the Import: Verifying Your Data
Once your import is complete, it's a good idea to verify everything imported correctly:
- Navigate to Customers → All Customers
- Use the search and filter options to find your newly imported customers
- Review a few sample customer records to ensure:
- Contact information is correct
- Addresses are properly formatted
- Agent and office assignments are as expected
- If you notice any issues, you can edit individual customer records or perform another import to correct the data
Common Questions and Troubleshooting
Q: What if I have duplicate customers in my CSV file?
The import process includes duplicate detection based on email address and phone number. If a customer with the same contact information already exists in your system, the import will skip that record to prevent duplicates.
Q: Can I import customers with existing policies?
This import feature creates customer records only. To import policies associated with these customers, you'll need to use the separate policy import feature or carrier downloads functionality.
Q: What happens if my CSV file has errors?
The wizard validates your file in Step 2. If there are critical errors (like missing required fields or invalid data formats), you'll see error messages and won't be able to proceed until you fix the CSV file and re-upload it.
Q: Can I import customers to multiple offices at once?
Yes! Include the target_office_name column in your CSV file with the appropriate office name for each customer. Each customer will be assigned to their specified office during import.
Q: What if I don't know which agent should be assigned to a customer?
Leave the target_agent_email field blank. Those customers will be assigned to you (the person performing the import) by default. You can reassign them to other agents later from the customer details page.
Best Practices for Importing Your Book of Business
- Clean your data first: Before importing, review your spreadsheet for duplicate entries, incomplete records, and formatting inconsistencies
- Start small: Test with 5-10 records first to ensure your CSV format is correct
- Use exact column names: Copy column headers directly from the template to avoid typos
- Include agent and office assignments: While optional, including
target_agent_emailandtarget_office_namesaves you from manually reassigning customers later - Keep your External IDs: If you're migrating from another system, include your old customer IDs in the
external_idcolumn for easy cross-reference - Import in batches: For very large books of business (1000+ customers), consider importing in multiple batches to make verification easier
Conclusion
Importing your book of business is one of the most important steps in getting started with Taino Solutions. With the CSV import wizard, you can bring hundreds or thousands of customers into the platform in just a few minutes. Take the time to prepare your data properly, use the template provided, and don't hesitate to start with a small test batch. Once your customers are in the system, you'll be ready to leverage all of Taino's powerful features for managing policies, automations, communications, and more.
Watch the video below for a step-by-step tutorial: