Your Taino dashboard is fully customizable — rearrange widgets, add new ones, remove what you don't need, and create a workspace that fits your workflow. Each agent can personalize their own dashboard with the widgets and information most relevant to their role.
How to Access Dashboard Customization
Navigation Path:
- Go to your Dashboard (click Dashboard in the left sidebar, or it's your default landing page)
- Click on your profile name/avatar in the top-right corner
- Select Personalize Dashboard from the dropdown menu
- The Dashboard Personalization editor opens
Understanding the Dashboard Editor
When you enter the Dashboard Personalization mode, you'll see:
Left Panel (Canvas) - Your Active Dashboard:
- Shows all currently visible widgets on your dashboard
- Displays widget titles at the top of each component (e.g., "Sales Pipeline Plan & Outcomes", "My Sales", "My Commissions", "Agency Totals")
- Each active widget has a small delete button (X) in the top-right corner
- You can drag widgets to rearrange their position
- You can resize widgets by dragging their edges
Right Panel - Available Widgets:
- Shows all widgets that are not currently on your dashboard
- Widget examples include: Tasks, Customer Growth, and others depending on your permissions
- Simply drag and drop from here to add to your dashboard
Top Section - Information & Controls:
- Blue information banner explaining drag-and-drop functionality
- Save Changes button (purple, top-right) - Click to save your customizations
- Cancel button - Discard changes and exit without saving
Visual Widget Differentiation
To help you quickly distinguish between personal and team-wide widgets, the dashboard uses a color-coding system:
In the Dashboard Designer:
- Blue accents (left border + "Personal" badge) - Agent-level widgets showing your personal data
- Purple accents (left border + "Agency" badge) - Agency-level widgets showing team-wide data
On Your Live Dashboard:
- Blue top border + "Personal" badge - Agent-level widgets (e.g., My Sales Pipeline, My Commissions)
- Purple top border + "Agency" badge - Agency-level widgets (e.g., Agency Totals, Agency Sales Pipeline)
This visual system makes it easy to scan your dashboard and immediately identify whether you're looking at personal metrics or team performance at a glance.
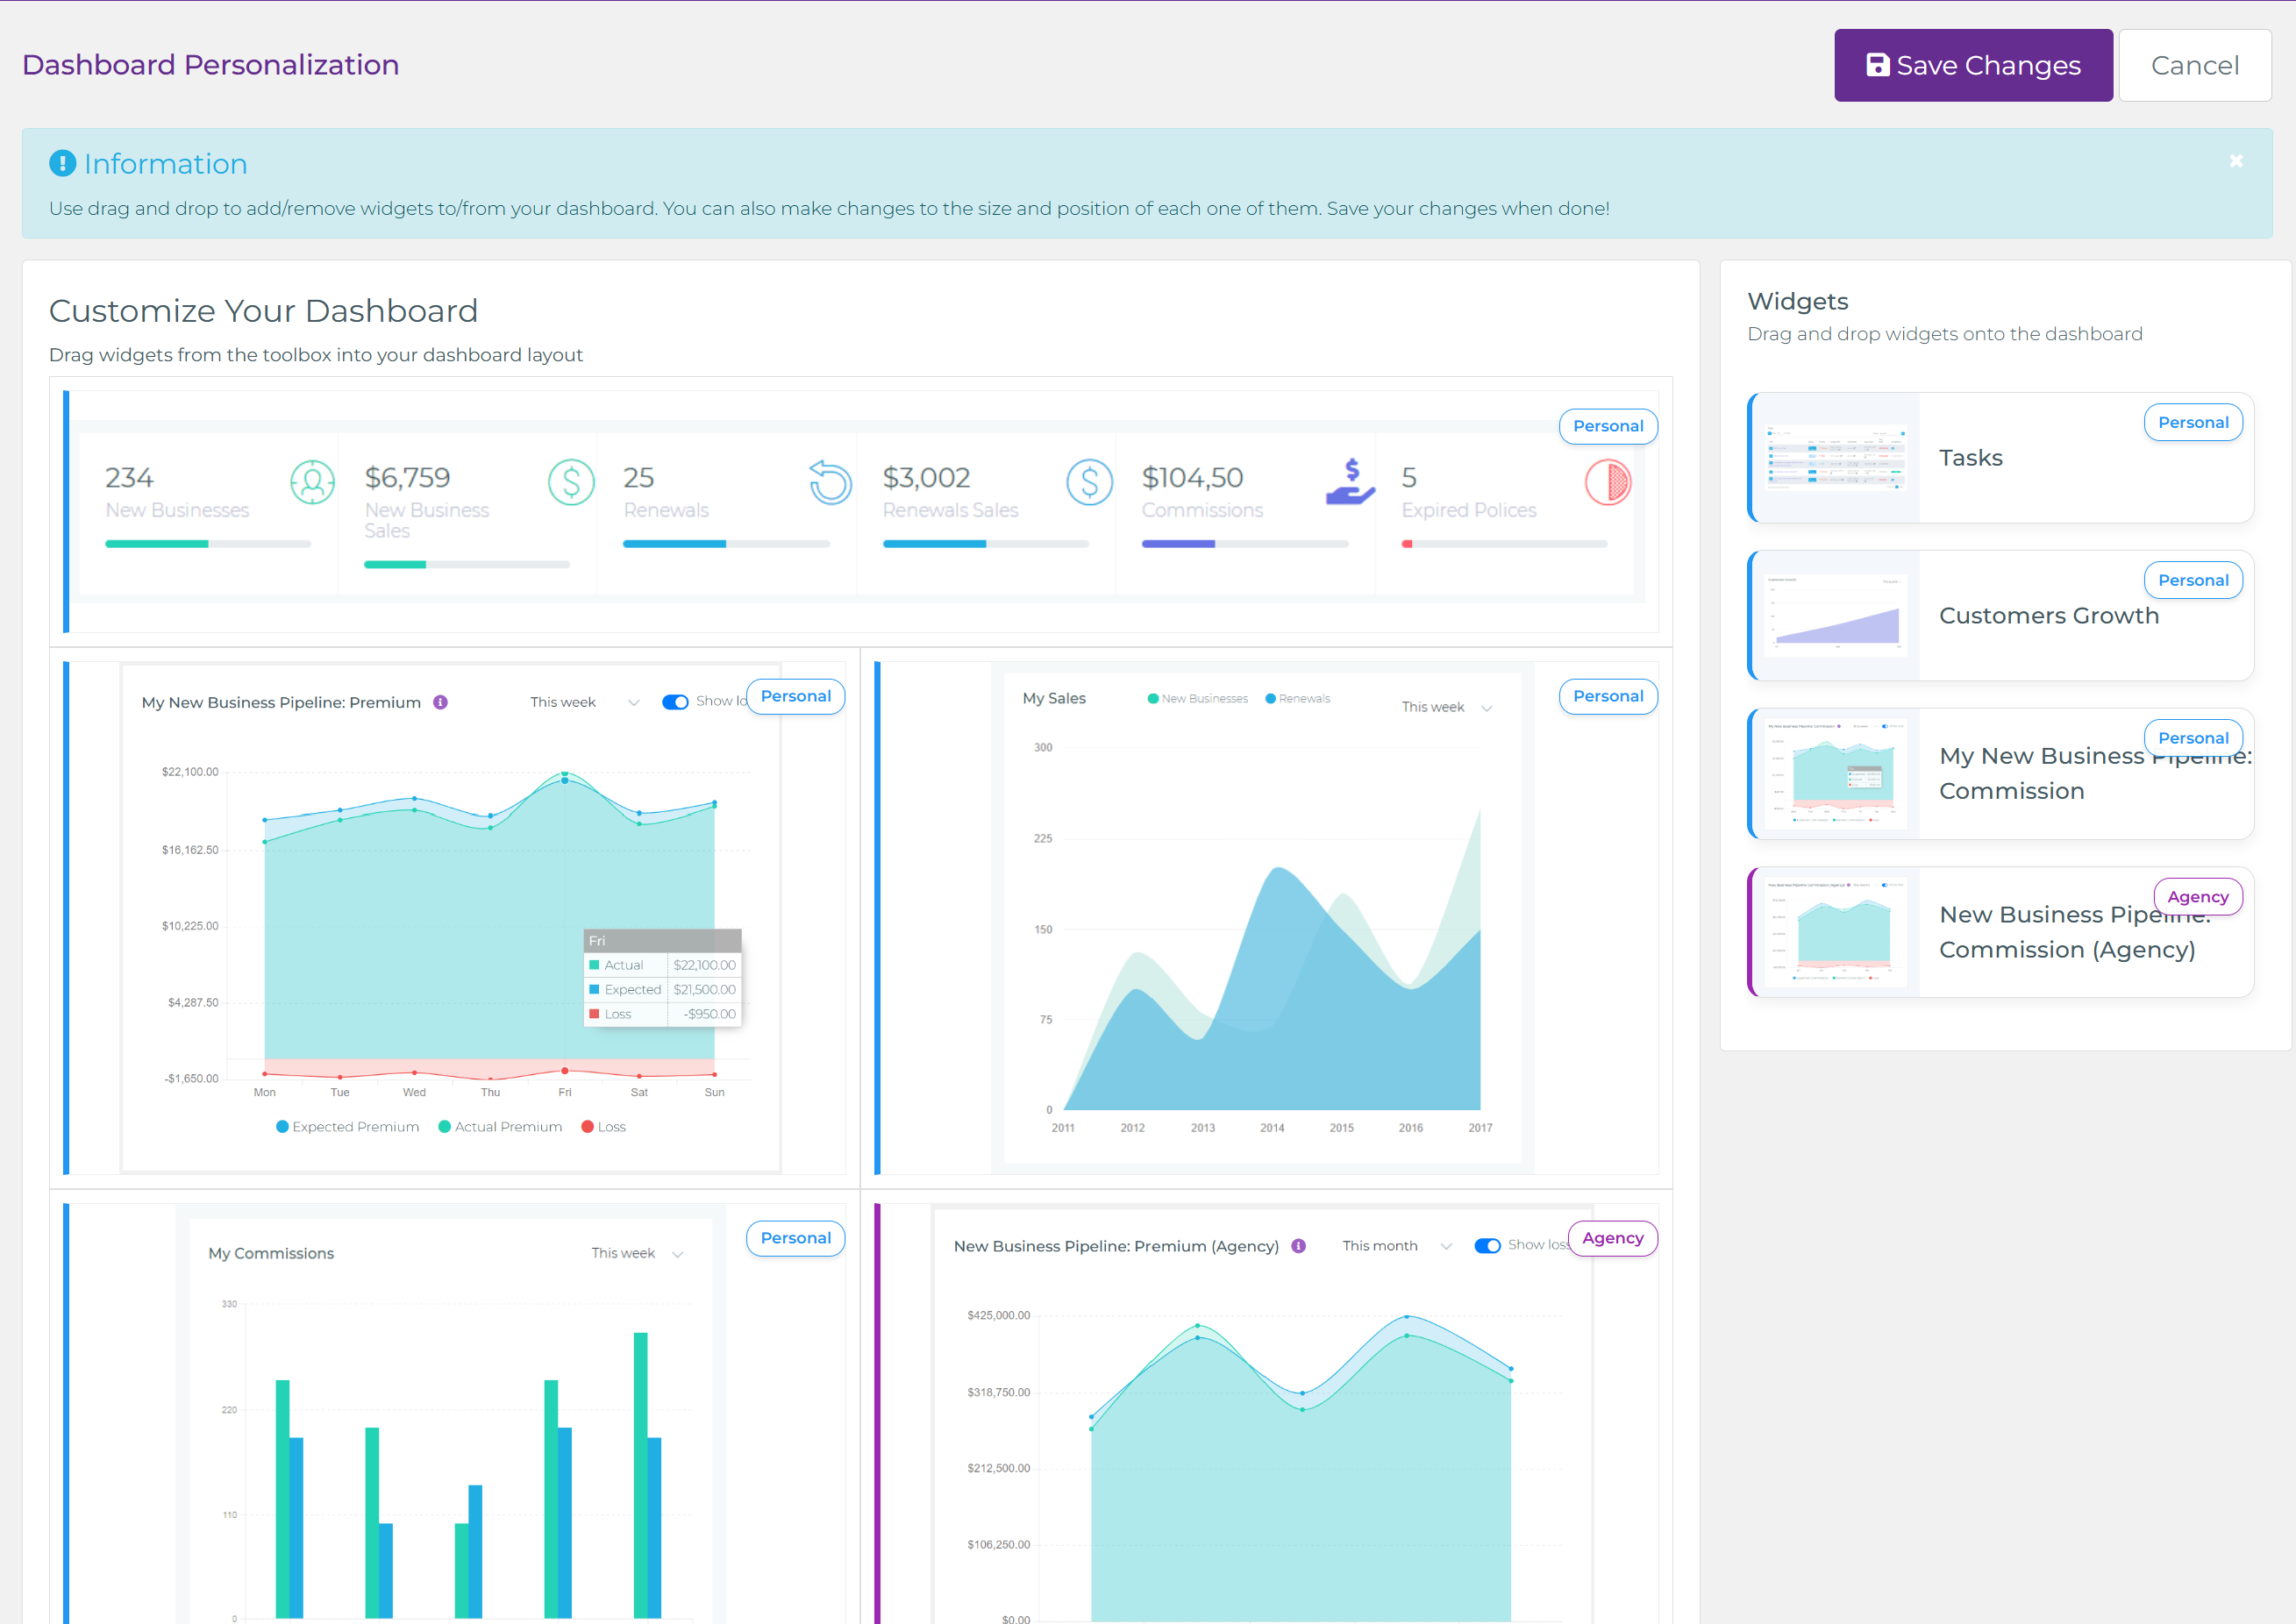
Dashboard Designer with blue borders and "Personal" badges for Agent widgets, purple borders and "Agency" badges for Agency widgets
Widget Types & Permissions
Agent-Level Widgets (personal to you):
- My Sales Pipeline Plan & Outcomes: Your personal sales pipeline with expected, pending, and posted values
- My Sales: Your individual sales performance over time
- My Commissions: Your commission earnings breakdown
- Tasks: Your assigned tasks summary
Agency-Level Widgets (require specific permissions):
- Sales Pipeline Plan & Outcomes (Agency): Entire agency's sales pipeline overview
- Agency Totals: Key metrics including new businesses, new sales, renewals, renewal sales, and commissions
- Customer Growth: Agency-wide customer growth trends
Note: You'll only see widgets available to your user role. Agency-level widgets may not appear in your available list if you don't have the necessary permissions.
Step-by-Step: Customizing Your Dashboard
Adding a Widget:
- Open Dashboard Personalization (Profile menu → Personalize Dashboard)
- Look at the Widgets panel on the right side
- Find the widget you want to add (e.g., "Tasks" or "Customer Growth")
- Click and drag the widget from the right panel onto the left canvas
- Drop it where you want it positioned
- The widget appears on your dashboard canvas
Removing a Widget:
- Open Dashboard Personalization
- Find the widget you want to remove on your dashboard (left panel)
- Look for the small X button or delete icon at the top-right corner of that widget
- Click the X button
- The widget is removed from your dashboard and moves to the "Available Widgets" panel on the right
Rearranging Widgets:
- Open Dashboard Personalization
- Click and hold on any widget's title bar (top section of the widget)
- Drag the widget to your desired position on the canvas
- Other widgets will shift to accommodate the new position
- Release to drop the widget in place
Resizing Widgets:
- Open Dashboard Personalization
- Hover over the edges or corners of a widget
- Your cursor will change to indicate resize capability
- Click and drag the edge to make the widget larger or smaller
- Adjust to your preferred size
Saving Your Changes:
- After making all desired customizations
- Click the Save Changes button (purple button, top-right corner)
- Your customized dashboard is saved
- You'll return to your dashboard with the new layout
Canceling Changes:
- If you want to discard your changes, click Cancel (top-right)
- Your dashboard will remain as it was before you started editing
Dashboard Widget Features
Many dashboard widgets include interactive features:
- Time Period Filters: Widgets like "My Sales" and "My Commissions" often have dropdowns to select time periods (This week, This month, Year to date, etc.)
- Data Visualization: Charts showing trends with color-coded legends (Expected, Pending, Posted values)
- Real-Time Updates: Widgets refresh automatically to show current data
- Quick Metrics: Agency Totals widget displays key numbers like new businesses count, sales amounts, renewals, and commissions
- Clickable Elements: Many widgets have clickable areas that navigate you to detailed views
Tips for an Effective Dashboard
- Prioritize What You Use Most: Place your most-viewed widgets at the top or in prominent positions
- Group Related Widgets: Keep sales widgets together, task/activity widgets together, etc.
- Don't Overcrowd: Remove widgets you rarely check — you can always add them back later
- Adjust for Your Screen: Resize widgets to fit your monitor size and resolution
- Role-Specific Layout: Sales agents might prioritize pipeline and commission widgets, while managers focus on agency-level metrics
- Experiment: Try different layouts — you can always reset by removing and re-adding widgets
Common Questions
Can I have different dashboard layouts on different devices?
No, your dashboard customization is tied to your user account and syncs across all devices. The same layout appears wherever you log in.
Why can't I see certain widgets?
Widget availability depends on your user role and permissions. Agency-level widgets (like Agency Totals or agency-wide pipelines) are only available to users with appropriate access rights.
Can I reset my dashboard to default?
Yes, you can remove all widgets and re-add the default ones, or contact your administrator to reset your dashboard to the agency default configuration.
Do my changes affect other users?
No, dashboard customization is personal to each user. Your layout changes don't impact anyone else's dashboard.
Watch the video below for a step-by-step tutorial: