The Simple Payments Approach simplifies the payment process during policy creation. When using this method, agents do not need to schedule or generate payments upfront. Instead, once the policy is created, the agent can manually create one payment at a time when the payment is received from the customer. This flexibility allows agents to manage payments as they come in, without having to schedule them during policy creation.
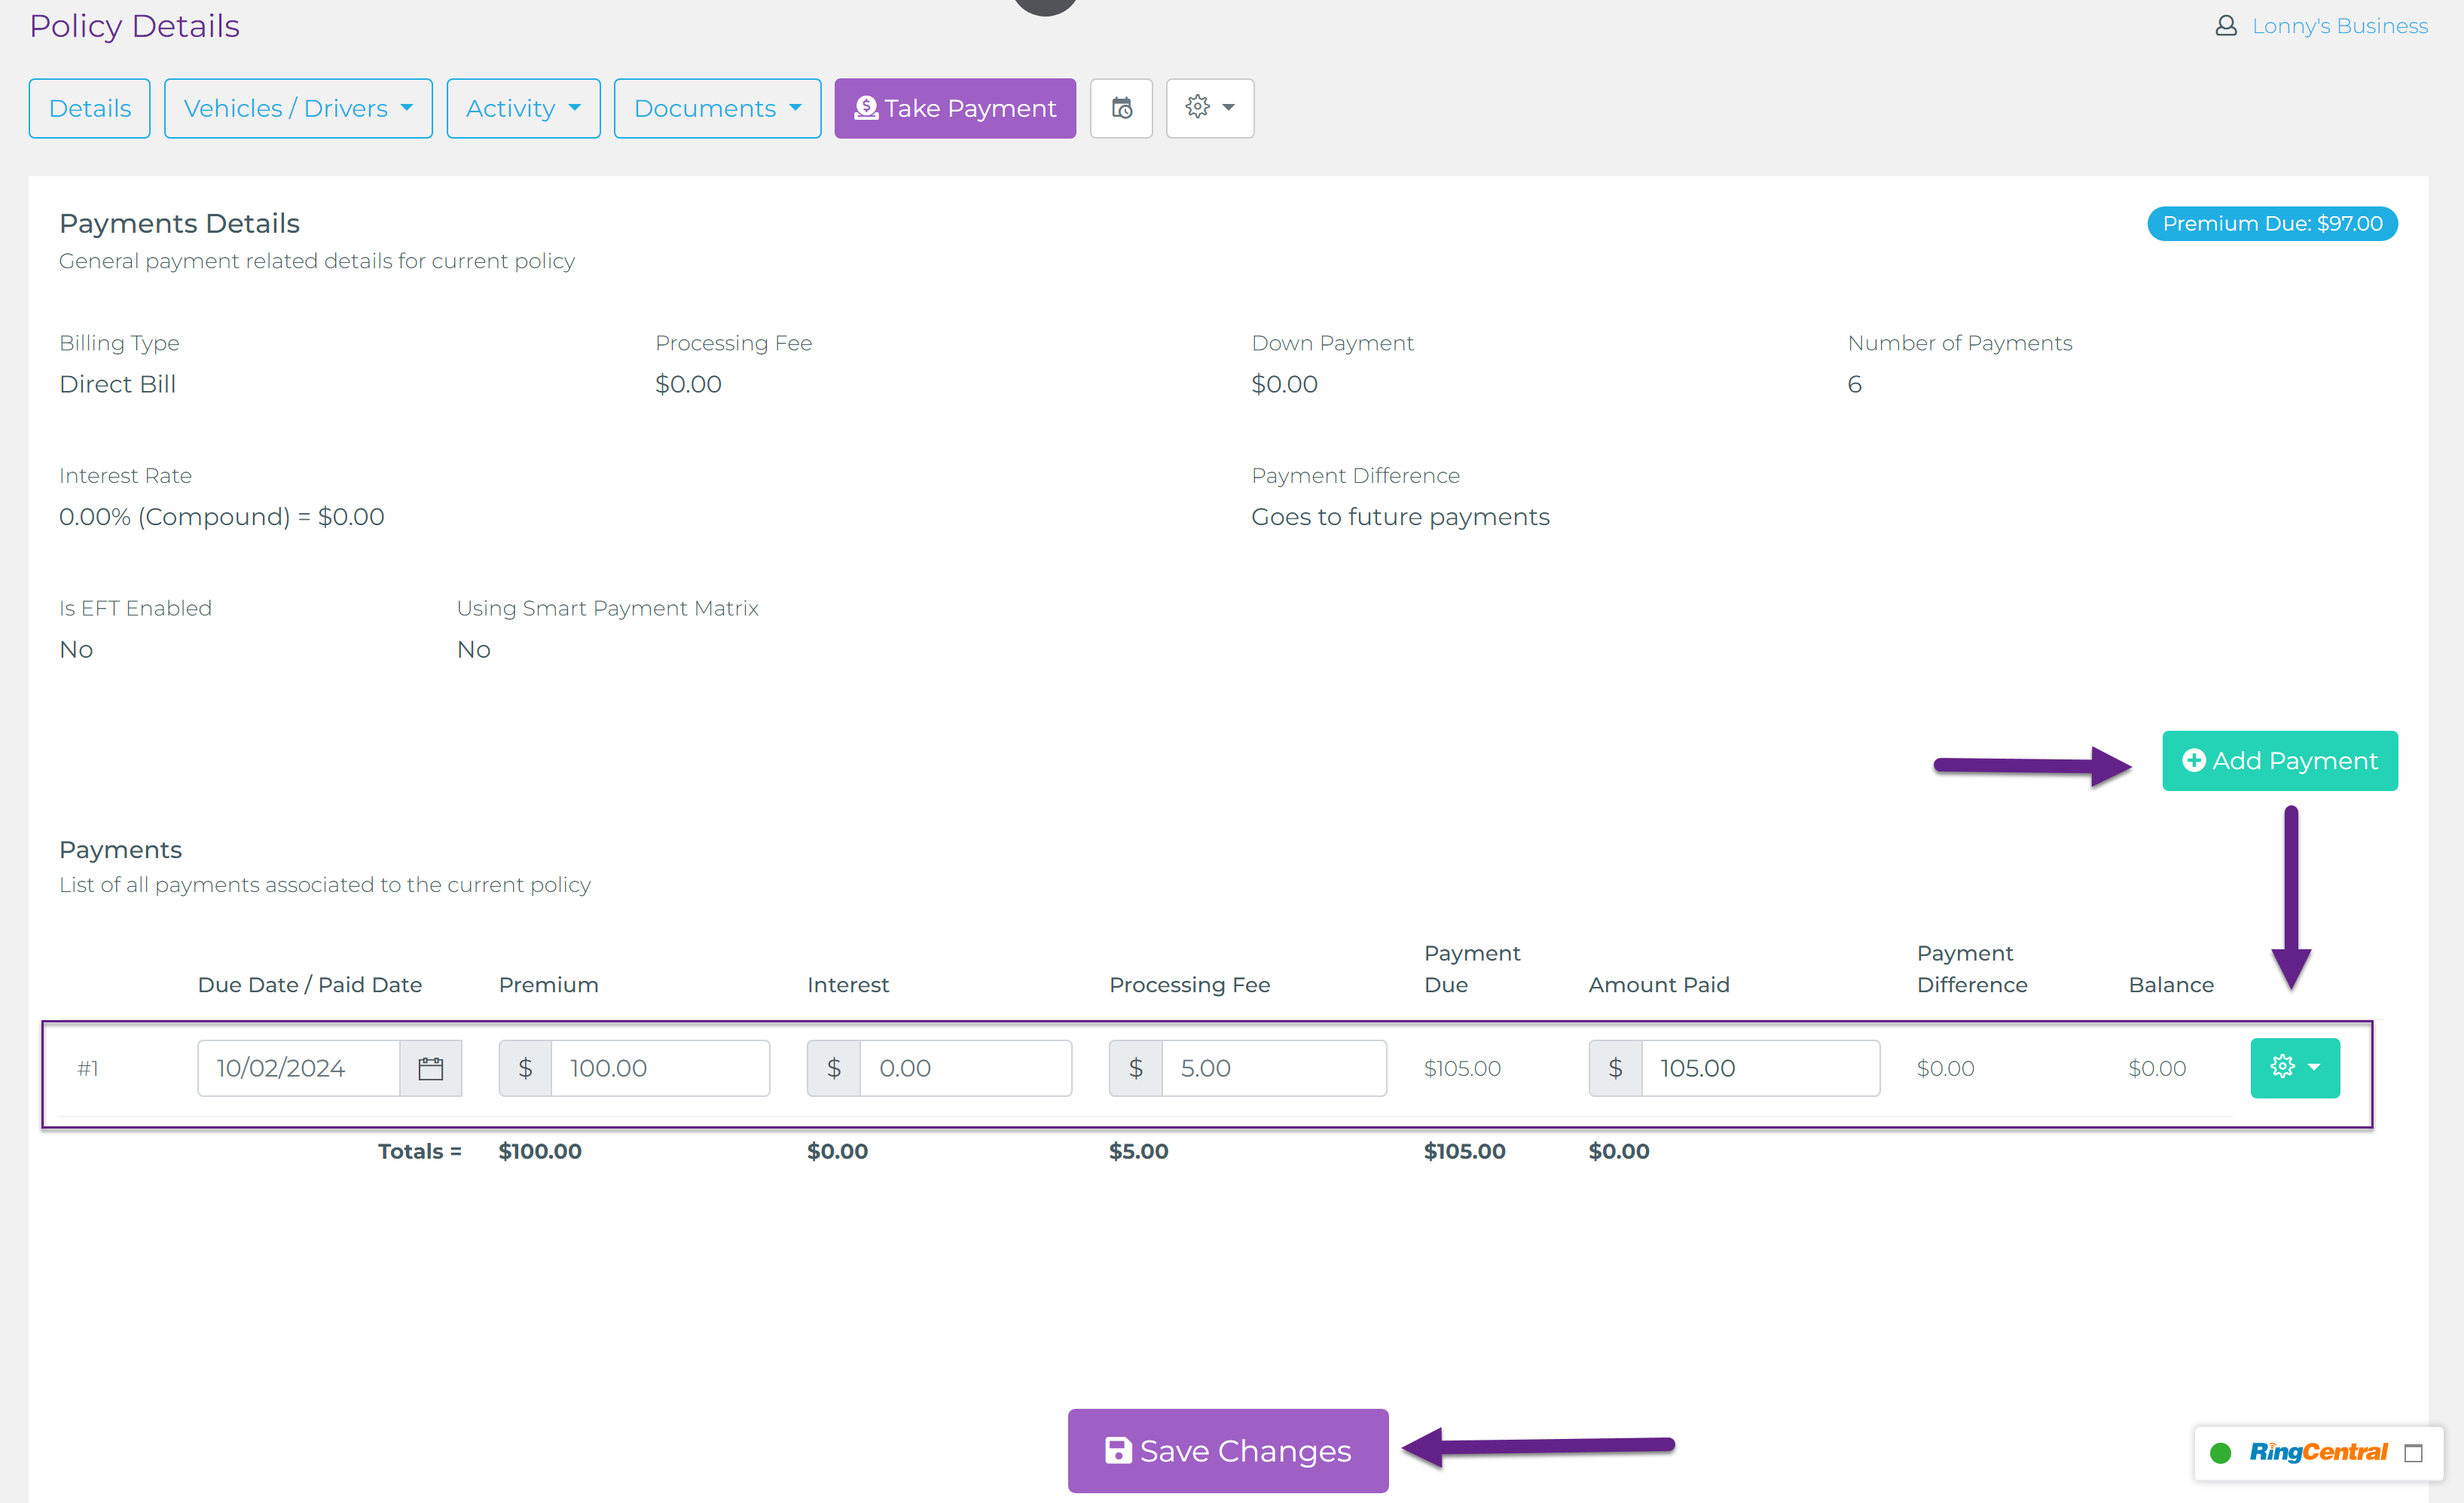
To add a new payment record, agents can specify the Premium Amount, any Interest Amount (if applicable), and a Processing Fee (optional) that the agency may charge for this payment. Once these values are set, alongside the payment date (when the payment was made or when it is due), the agent has two options:
- Save Changes: This option is used when the payment is being scheduled for a future date.
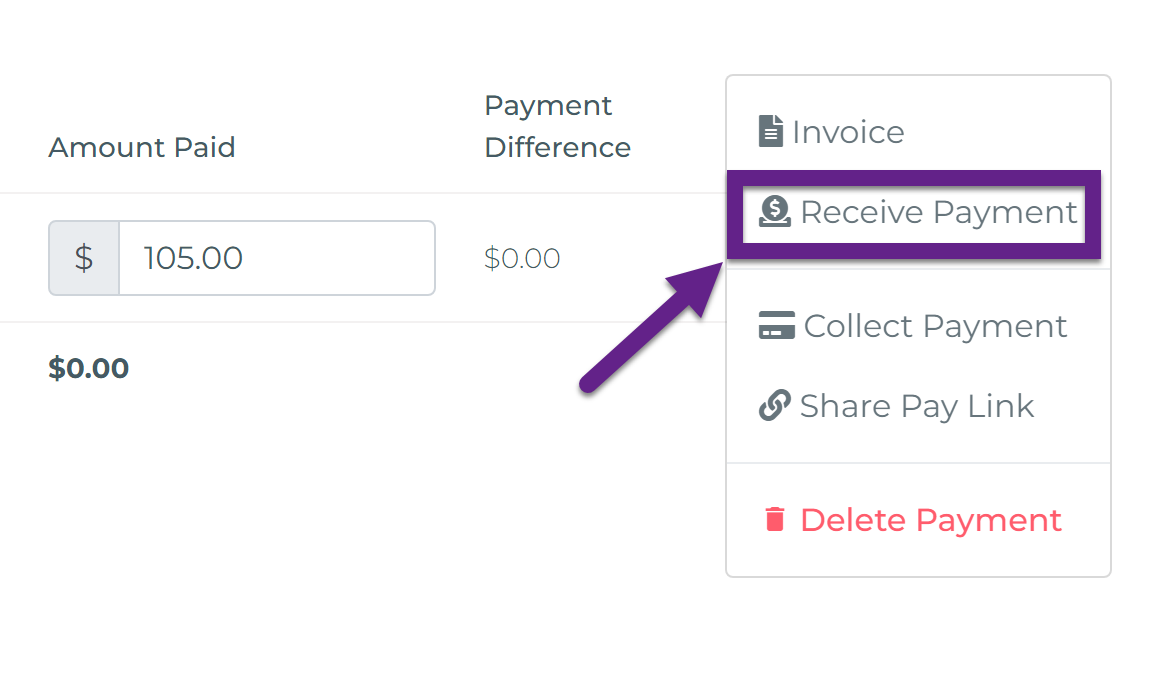
- Receive Payment: If the payment is being made and received immediately, the agent can click the green button next to the payment row and select "Receive Payment".

Here is where agents will find the green button to receive a payment:

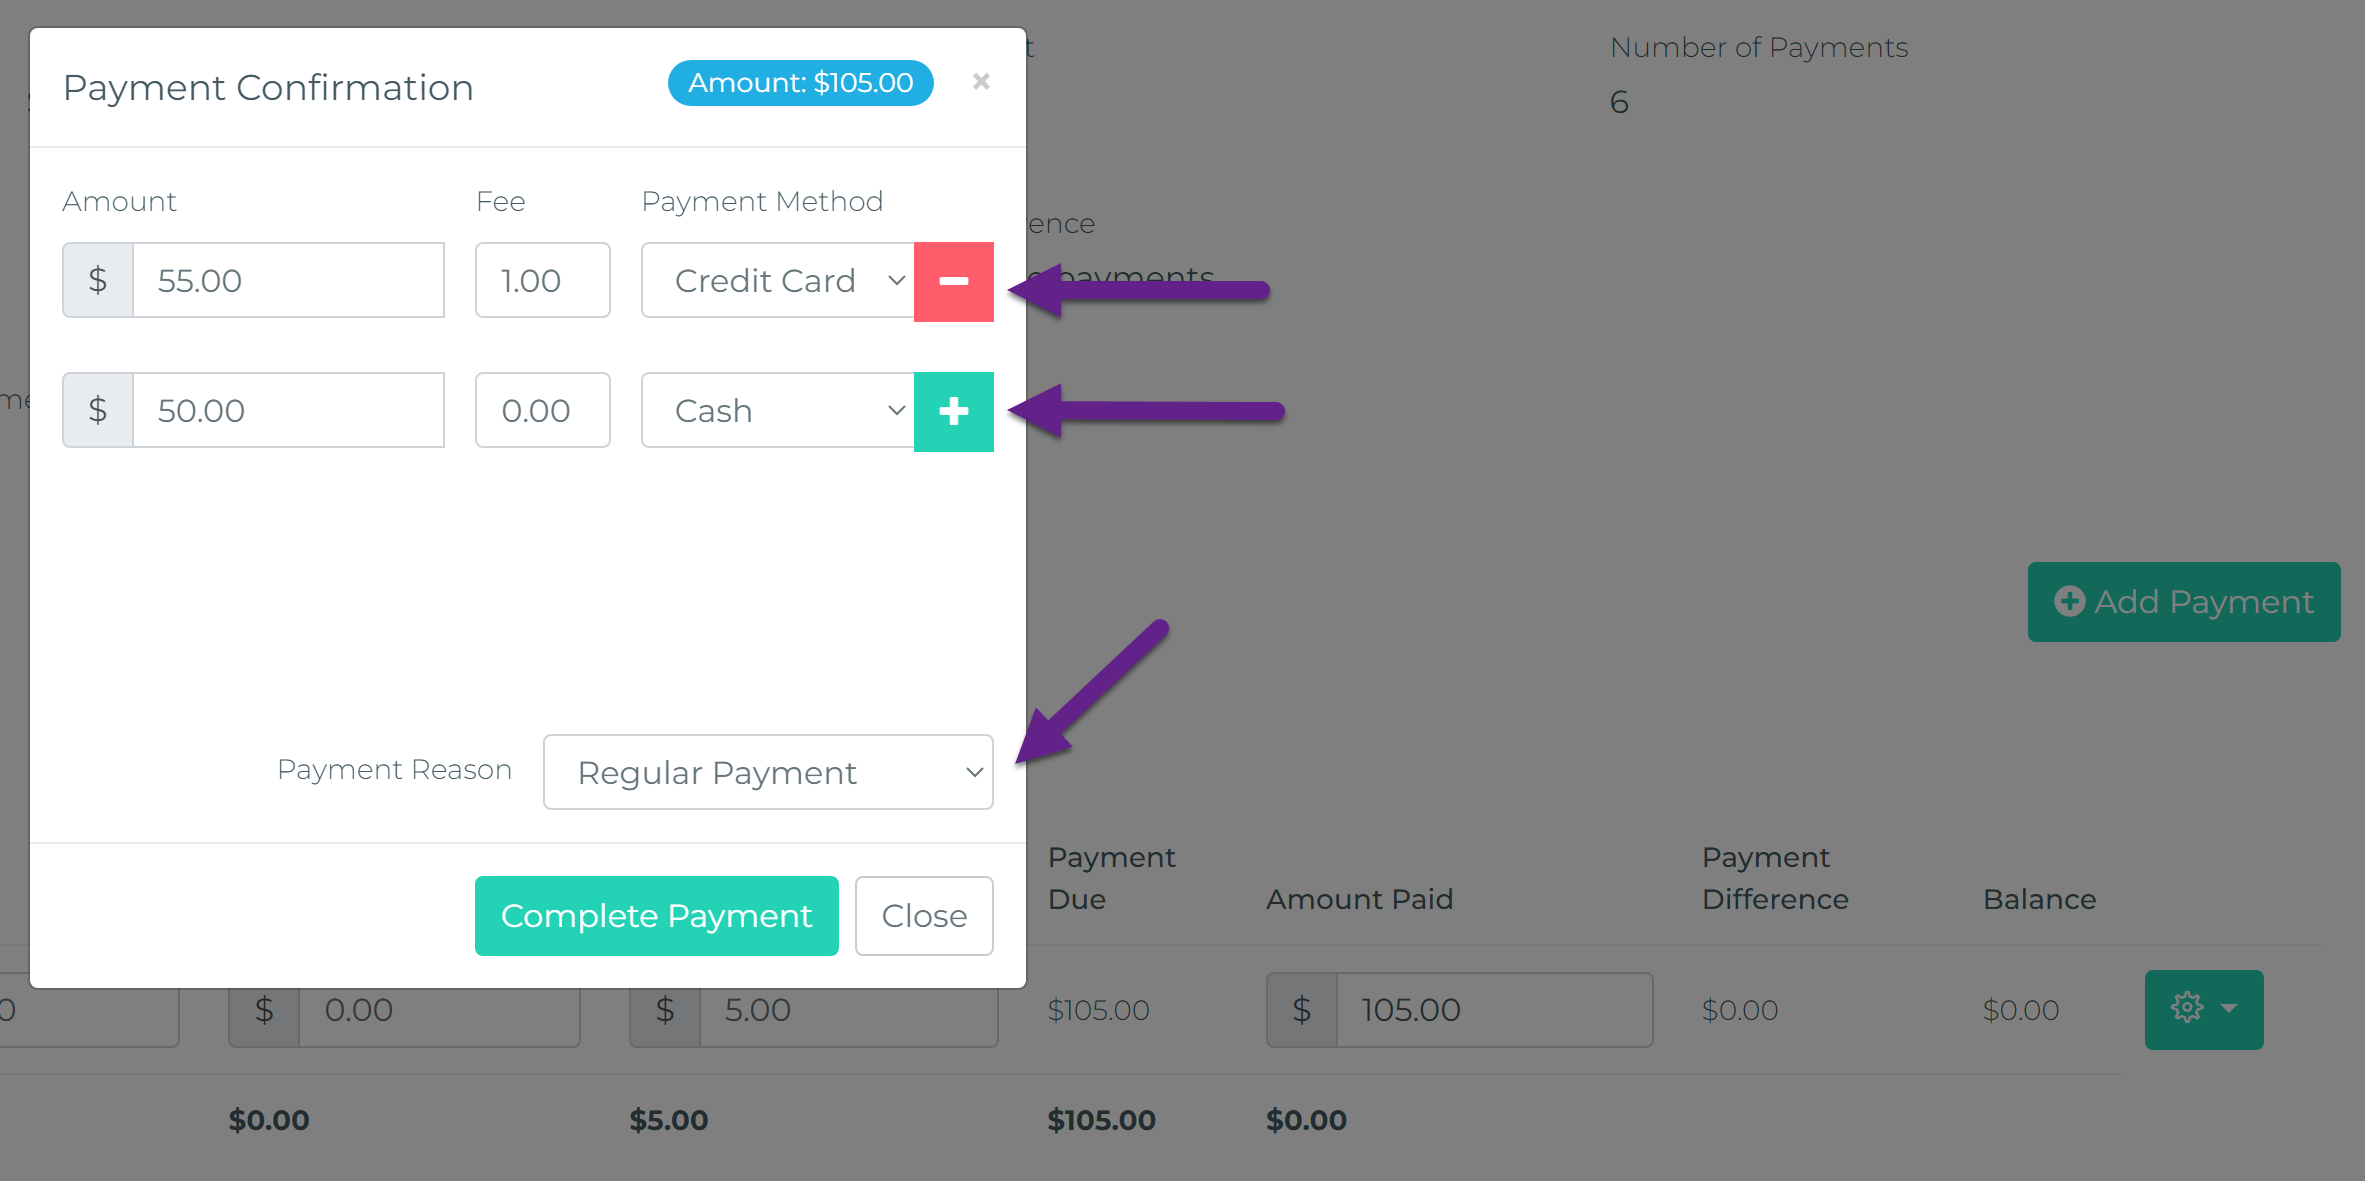
When the Receive Payment option is selected, a pop-up window will appear with options on how to receive the payment. In this window, agents can split the payment across different methods. For example, if a customer paid part of the amount using a credit card and another part in cash, the agent can add two rows: one for the credit card payment (with an optional credit card fee) and another for the cash payment.

Additionally, agents can select the Payment Reason, which by default is set to "Regular Payment". Depending on the purpose of the payment (e.g., Down Payment, Endorsement, Cancellation Fee), this field can be adjusted to reflect the specific reason for the payment.
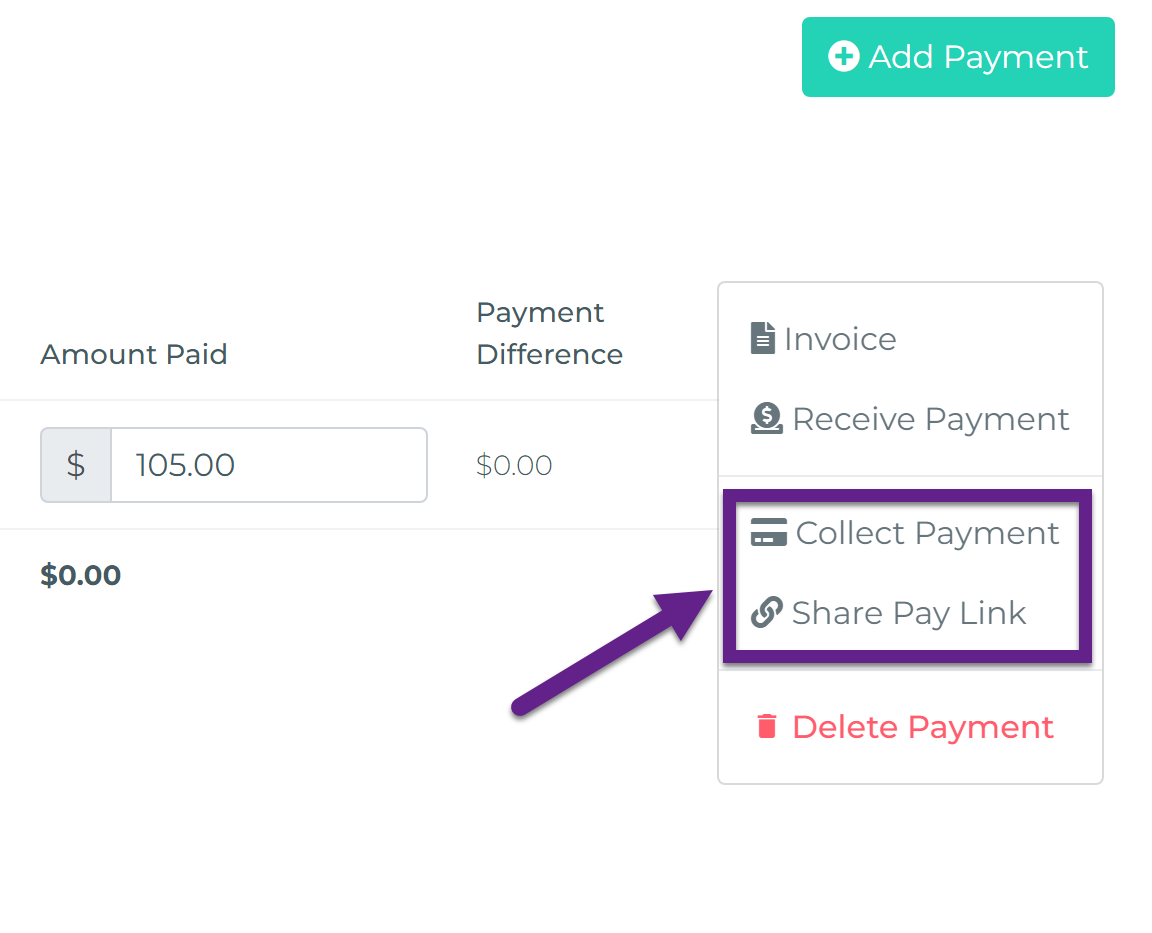
However, for agents looking to collect actual payments electronically, Taino Solutions offers a streamlined way to handle this as soon as the payment record is added and amounts are specified. Agents can create an electronic payment link, either processing the payment directly using customer credit card details or sharing the payment link with the customer. For a more detailed guide on how to process electronic payments, please refer to the Electronic Payments article.

For those who prefer to plan ahead, the Simple Payments Approach also allows agents to manually create multiple future payments. Agents can specify a future date for each payment and set the amount. This feature takes full advantage of the platform’s automation and notification systems, ensuring that all scheduled payments are monitored just as they would be in the Smart Payment Matrix.
The best practice when using the Simple Payments Approach is to either create all payment entries ahead of time or, each time a payment is received, create the next one. By doing so, agents can ensure that the payment is scheduled, and the platform will handle all invoicing, notifications, and other automated processes related to payment tracking. This method helps agents stay organized and ensures that customers are notified well in advance of any upcoming payments.
Watch the video below for a step-by-step tutorial. Although this example is based on creating an endorsement, the same process applies when creating a policy: